Breeding ember tetras (Hyphessobrycon amandae) successfully requires understanding a critical paradox: these nano fish spawn readily in home aquariums but raising the fry to adulthood challenges even experienced aquarists. This guide synthesizes professional techniques and scientific research to provide the complete roadmap from selecting pairs to mastering the critical first foods for the microscopic fry.
Quick Stats:
- 70-90% Spawning Success Rate
- 15-25% First-Time Fry Survival
- ~0.7″ Maximum Adult Size
- 8-10 Weeks to Raise Fry
While marketing materials claim they’re “easy to breed,” the reality is more nuanced—triggering spawning is straightforward, but achieving 20% fry survival to juvenile stage requires meticulous preparation. The key differentiator between success and failure isn’t the breeding setup itself, but having microscopic live food cultures ready before eggs hatch, since newly free-swimming fry cannot eat standard foods like baby brine shrimp for 10-14 days.
Key Insight: This guide synthesizes professional breeder techniques, scientific research, and real-world breeding experiences. Unlike neon tetras that require strict parameters and darkness, ember tetra eggs aren’t light-sensitive and tolerate broader water chemistry, making them among the top five easiest tetras to breed—yet their extraordinarily slow growth (2 months to reach just 1/4 inch) and microscopic fry demand patience and daily commitment.
Understanding Ember Tetra Reproduction
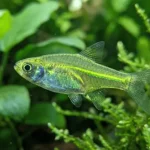
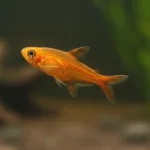
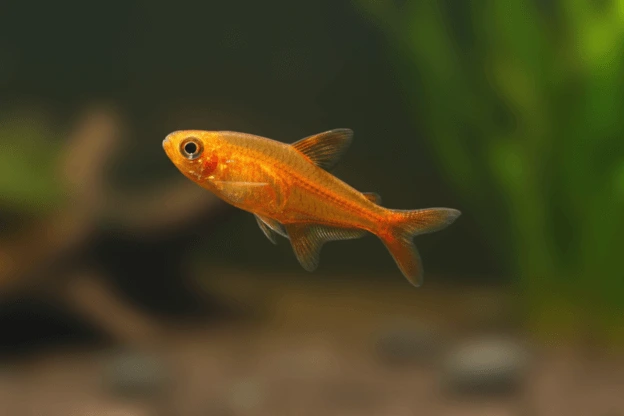
Ember tetras originate from the Araguaia River basin in central Brazil, where they inhabit slow-moving blackwater tributaries with temperatures of 75-82°F, pH 5.0-7.0, and very soft water (2-10 dGH). Discovered in 1986 by Heiko Bleher and scientifically described in 1987, these tiny fish—reaching only 0.6-0.8 inches maximum length—have become popular aquarium residents due to their vibrant copper-orange coloration and peaceful schooling behavior.
Identifying Males vs. Females
Distinguishing males from females proves challenging for beginners but becomes easier with practice:
- Females: Rounder bodies when viewed from above, particularly when carrying eggs. Larger, more prominent swim bladders visible through semi-transparent bodies.
- Males: Slimmer torpedo-shaped profiles, smaller irregularly-shaped swim bladders, intensify to brilliant copper-red during breeding.
- Gravid females: Swollen abdomen with dark gravid spot near tail base 24-48 hours before spawning, carrying 30-60 eggs per cycle.
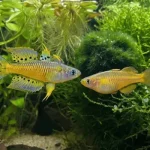
Courtship Behavior
Courtship behavior often gets mistaken for aggression by novice keepers. Males initiate breeding by chasing gravid females persistently throughout the tank, nipping at them while displaying their brightest colors. When receptive, females participate in elaborate courtship dances lasting 30+ minutes, with dramatic displays under heavy plant cover. Peak activity occurs in early morning when lights first come on.
The Most Important Fact: Zero Parental Care
As egg-scatterers with zero parental care, adult ember tetras will immediately consume their own eggs and fry if given access—the single most important fact affecting breeding success. The actual spawning event happens in seconds: females scatter 30-60 non-adhesive eggs randomly while males simultaneously release milt for fertilization.
The species spawns frequently under optimal conditions, with females capable of producing eggs every two weeks when properly fed and conditioned. This frequent breeding potential means a well-maintained school of 10-15 fish in a planted community tank will spawn spontaneously throughout the year, though without intervention only 1-5% of fry survive predation.
Difficulty Comparison: Where Ember Tetras Rank
Guppies & Livebearers (Easy)
Fully-formed free-swimming fry, no special setup needed, eat crushed flakes immediately.
Success Rate: 80-95%
White Cloud Mountain Minnows (Easy)
Larger eggs, robust fry, tolerant of varied conditions, good beginner egg-layer.
Success Rate: 60-80%
Ember Tetras (Moderate)
Easy spawning but microscopic fry require infusoria cultures, slow growth, 2-3 months to maturity.
Success Rate: 30-50%
Neon Tetras (Difficult)
Require very soft water (< 5 dGH), complete darkness, strict pH 5.0-6.0, light-sensitive eggs.
Success Rate: 15-30%
Discus & Dwarf Cichlids (Difficult)
Large tanks, precise water chemistry, complex pair bonding, parental care behaviors.
Success Rate: 10-25%
Why Ember Tetras Are “Moderately Difficult”
- Easy aspects: Readily spawn in community tanks, eggs aren’t light-sensitive, tolerate broader water parameters than neon tetras, no complex pair bonding required.
- Challenging aspects: Microscopic fry require infusoria for 10-14 days (cannot eat baby brine shrimp immediately), extraordinarily slow growth (2 months to 1/4 inch), daily feeding commitment for 8-10 weeks, high mortality without prepared cultures.
Setting Up Breeding Tanks
Two Approaches to Breeding
Community Tank Breeding (Casual Approach)
- Setup: 20+ gallon aquarium with 10-15 ember tetras, heavily planted with Java moss, water sprite, and floating plants.
- Pros: Minimal intervention, natural spawning environment, some fry may survive in dense vegetation.
- Cons: Only 5-10% fry survival, unpredictable outcomes, difficult to monitor eggs, tankmates consume most eggs/fry.
- Best for: Hobbyists accepting low yields, wanting occasional surprise fry without intensive setup.
Dedicated Breeding Tank (Professional Approach)
- Tank size: 2.5-10 gallons (5 gallons optimal for monitoring without excessive dilution)
- Egg protection: Plastic mesh or egg crate 2-3 inches above bottom, with Java moss underneath. Eggs fall through gaps, safe from adult predation.
- Alternative methods: Glass marbles on bottom, bare-bottom with immediate adult removal.
- Success rate: 10-20x higher fry survival (30-60%) through complete environmental control.
- Best for: Serious breeders, those wanting consistent yields, learning the complete breeding process.
Essential Equipment
- Sponge Filter: CRITICAL: The only acceptable filtration. Standard filters will suck up microscopic fry. Run at very low output in fry tanks.
- Heater: Maintain stable 78-82°F (80°F optimal). Fluctuations of 2°F+ can prevent egg development or stress fry.
- Subdued Lighting: Dim lighting or covered tank simulates shaded blackwater habitat. Dawn simulation triggers spawning.
- Java Moss: Essential spawning substrate. Eggs lodge safely in moss. Provides natural microfauna for fry.
The Spawning Trigger Protocol
- Evening Before: Perform 50% water change with aged water 2-3°F cooler. Simulates rainfall/temperature drops that trigger breeding.
- Add Breeding Pair/Group: Introduce 1-2 males with 2-3 females after water change. Or pre-introduce female 1-2 days early to acclimate.
- Complete Blackout: Cover tank with dark towel overnight. Ensures total darkness, reduces stress, allows natural behavior.
- Dawn Simulation: Morning: Remove cover, turn on dim lights or expose to morning sun. Spawning typically occurs within hours.
- Remove Adults: CRITICAL: Remove all adults within 2-3 hours maximum of confirmed spawning. Every hour increases egg predation risk.
Water Parameters for Optimal Breeding
Ideal Breeding Parameters
- Temperature: 78-82°F (80°F is optimal. Triggers breeding behavior. Stable temps critical for egg development.)
- pH Level: 6.5-7.0 (Neutral to slightly acidic. Use RO water, peat filtration, or Indian almond leaves.)
- General Hardness: 3-6 dGH (Soft water dramatically improves egg fertility and hatch rates vs hard water.)
- Carbonate Hardness: 2-4 dKH (Low KH preferred. Helps maintain stable acidic pH.)
- TDS: < 100 ppm (Professional breeders use 50-80% RO water mixed with aged tap water for best results.)
- Ammonia/Nitrite: 0 ppm (Zero tolerance. Test regularly. Nitrate should stay below 20ppm.)
Reality Check on Parameters: While professional breeders targeting 70% fry survival use RO water to achieve pH 6.5-6.8 and TDS under 100ppm, hobbyist success at 30-40% survival occurs regularly in moderately soft tap water (150-250ppm TDS, pH 7.0-7.4) with proper conditioning and feeding.
Key principle: Stability trumps perfect numbers. Fish adapt to consistent conditions even outside “ideal” ranges. Chasing parameters with chemicals creates harmful fluctuations.
Conditioning Adults & Triggering Spawning
Proper Conditioning (2-3 Weeks Before)
Proper conditioning makes the difference between scattered unsuccessful spawning and consistent egg production. Diet during this phase must be protein-rich and preferably live or frozen.
- Baby Brine Shrimp: Live Artemia nauplii are protein-rich and trigger spawning readiness. Feed 2-3x daily during conditioning.
- Grindal Worms: High-fat live food. Produces noticeably plumper females and more vibrant males.
- Daphnia: Live water fleas provide excellent nutrition and natural gut-loading benefits.
- Bloodworms: Frozen or live. High protein content helps females develop eggs rapidly.
- Moina: Smaller than daphnia, perfect size for ember tetras. Rich in nutrients.
- Microworms: Easy to culture, readily consumed. Good supplementary conditioning food.
Signs of Breeding Readiness
- Females: Visibly rounded with swollen abdomens “several hours after feeding,” appear as “happy little spheres”
- Males: Display most intense copper-red coloration, actively chase females
- Dark gravid spot: Appears near tail base 24-48 hours before spawning
- Courtship displays: Elaborate dances, barrel-rolling, writhing around each other
Breeding Group Selection
- Single pairs (1M + 1F): Works but may have lower success if compatibility issues exist.
- Small groups (1-2M + 2-3F): RECOMMENDED. Allows natural mate selection, competition improves spawning behavior.
- Colony breeding (5M + 5F): Enables multiple spawnings, genetic diversity, but requires larger tanks (10-20 gallons) and more monitoring.
Timing & Procedure
- Days -2 to -1: Pre-Conditioning. Option to introduce gravid female alone to breeding tank for 1-2 days with minimal feeding. Allows acclimation without male distraction.
- Evening: Water Change & Introduction. Perform 50% cool water change. Add male(s) immediately after. Cover tank completely with dark towel for total blackout.
- Night: Blackout Period. Leave undisturbed overnight. Reduces stress, allows fish to settle into breeding behavior naturally.
- Morning: Dawn Simulation. Remove cover, turn on dim lighting or expose to morning light. Do NOT disturb for 3-4 hours. Spawning typically occurs within this window.
- Post-Spawning: Adult Removal. CRITICAL: Remove ALL adults within 2-3 hours maximum of confirmed spawning. Adults will consume eggs/fry without hesitation.
If No Spawning Occurs: If no spawning after 2-3 days, return breeding group to display tank. Resume conditioning for another 1-2 weeks before retrying. Persistence is normal—some pairs may require 2-4 attempts before successful spawning, especially if water chemistry isn’t optimal or fish are young/stressed.
Pro tip: Keep detailed records noting which pairs spawn successfully, timing, water parameters, and outcomes to refine your approach with each attempt.
Egg Care, Hatching, and Critical Early Fry Survival
Development Timeline
- Day 0-1: Eggs Hatch
- Day 2-4: Yolk Sac Absorption
- Day 5-7: Free Swimming!
- Day 7-14: Critical Feeding
- Day 14-21: BBS Introduction
- Week 8-10: Juvenile Stage
Egg Incubation (Days 0-1)
- Hatching time: 24-36 hours at 78-80°F (warmer water accelerates development)
- Lighting: Keep off or extremely dim. Though ember tetra eggs aren’t light-sensitive like neon tetras, reduced light still minimizes stress and fungal growth.
- Fungal protection: Add 2-3 drops methylene blue per gallon, OR use Indian almond leaves. Pristine water quality from aged, clean sources often suffices.
- DO NOT DISTURB: Resist urge to check constantly. Leave tank covered or dimly lit.
Larval Stage (Days 2-4)
Tiny larvae emerge, described as appearing like “transparent eyelashes with eyeballs.” They remain largely stationary, attached to surfaces or floating passively while absorbing yolk sacs.
Zero Intervention Period: NO feeding, NO water changes, Minimal observation, Tank covered or dimly lit, Only gentle aeration from air stone or very low-flow sponge filter, Temperature stability CRITICAL (even 2-3°F fluctuations cause mortality).
Free-Swimming & First Foods (Days 5-14)
Around day 3-5 after hatching, larvae become free-swimming and actively hunt for food. This marks the beginning of the most critical phase: providing microscopic first foods small enough for mouths measured in micrometers.
The Single Most Critical Factor:
Newly free-swimming fry CANNOT eat: Baby brine shrimp (400-500 microns), Microworms (200-400 microns), Commercial powdered fry food (>100 microns).
They REQUIRE: Infusoria (25-300 microns), Vinegar eels (50-100 microns), Green water (phytoplankton & microorganisms).
Non-Negotiable: Prepared Cultures: Setting up infusoria cultures 2-3 weeks BEFORE breeding is non-negotiable for serious success. This single factor determines whether 5% or 60% of fry survive the first two weeks.
Feed 40-50ml of infusoria culture to a 5-gallon fry tank 3-4 times daily starting when fry are free-swimming. Watch with magnifying glass or flashlight to verify fry have rounded bellies (successful feeding) versus empty transparent bellies (starvation).
Water Changes During Fry Rearing
- First week: Avoid or keep minimal (10-15% only if absolutely necessary) to prevent disturbing fragile fry and removing microscopic food particles.
- Day 10 onward: Daily 20-30% water changes with temperature and chemistry-matched aged water become MANDATORY to manage waste from feeding. Use airline tubing as gentle siphon, carefully avoiding fry.
Complete Feeding Schedules & Progression
Weekly Feeding Guide
Week 1-2: Infusoria Phase
- Primary food: Infusoria (paramecium, rotifers)
- Feeding frequency: 4-5 times daily
- Amount per feeding: 40-50ml culture per 5-gallon tank
- Alternatives: Green water, vinegar eels, sponge filter squeeze (releases microorganisms)
- Schedule example: 7am, 11am, 3pm, 7pm, 10pm
- Visual check: Fry bellies should appear rounded/full. Empty transparent bellies = starvation
- Water changes: Minimal (10-15% only if necessary)
Week 3-4: Transition Phase
- Primary foods: Continue infusoria + introduce baby brine shrimp (BBS)
- Feeding frequency: 3-4 times daily
- BBS readiness test: Add small amount of freshly hatched BBS and observe 2-3 hours. Pink/orange fry bellies = ready. Clear bellies = continue infusoria only.
- Schedule example: 7am (infusoria), 12pm (BBS), 5pm (infusoria), 9pm (BBS)
- Growth acceleration: BBS introduction causes dramatic growth increase
- Water changes: Daily 20-30% changes now MANDATORY
Week 5-8: Rapid Growth Phase
- Primary food: Baby brine shrimp (freshly hatched)
- Feeding frequency: 3-4 times daily
- Supplementary foods: Introduce finely crushed flakes, micro pellets
- Schedule example: 7am (BBS), 12pm (crushed flake), 5pm (BBS), 9pm (BBS)
- Growth milestone: Fry reach 1/4 inch (6mm) around weeks 4-6
- Size separation: At weeks 3-4, separate fry by size into multiple grow-out tanks to prevent competition
- Water changes: Daily 30-40% changes for optimal growth
Week 8+: Juvenile Phase
- Primary foods: Crushed adult foods, micro pellets, continued BBS
- Feeding frequency: 2-3 times daily
- Schedule example: 8am (crushed flake/pellet), 2pm (BBS), 8pm (crushed flake)
- Growth milestone: Reach ~1cm length at 3 months, showing adult coloration
- Community integration: Large enough to safely join community tanks without predation risk
- Sexual maturity: Arrives at 4-6 months, completing lifecycle
- Water changes: Continue daily 30-40% changes until moved to grow-out or community tank
Feeding Schedule Summary
- Week 1-2: 4-5 infusoria feedings daily
- Week 3-4: 3-4 feedings mixing infusoria and BBS
- Week 5-8: 3-4 BBS feedings daily with crushed foods
- Week 8+: 2-3 feedings of crushed adult foods and continued BBS
Key principle: Small frequent feedings better than large infrequent. Each feeding should create slight cloudiness that clears before next meal. Overfeeding crashes water quality; underfeeding causes starvation.
Raising Fry: Free-Swimming to Juvenile
Baby Brine Shrimp (BBS) Hatching
BBS introduction around day 14-21 marks a critical milestone when growth accelerates dramatically. These 400-500 micron nauplii are nutrient-dense with essential fatty acids from their yolk sacs.
- Hatching Container: 1-2 liter container with strong aeration, saltwater (1-2 tbsp aquarium salt per liter), and brine shrimp eggs.
- Temperature & Light: 74-82°F with 24-hour lighting. Eggs hatch in 18-36 hours.
- Harvesting: Turn off aeration for 5 minutes. Shells float, nauplii sink. Siphon concentrated BBS from bottom.
- Continuous Supply: Maintain staggered 24-36 hour cycles to ensure constant fresh BBS availability.
Growth Rate Reality Check
Slow Growth is Normal: Growth rates in ember tetra fry are frustratingly slow compared to other species:
- Weeks 1-4: Barely visible growth, remain microscopic
- Weeks 4-6: Reach 1/4 inch (6mm) with optimal feeding
- Week 12: Some sources report 2 months to reach 1/4 inch
- 3 months: Reach ~1cm length with developing adult coloration
- 4-6 months: Sexual maturity, completing lifecycle
This characteristic surprises and discourages beginners expecting rapid progress. Patience is absolutely essential.
Size Management
Size disparities become apparent around weeks 3-4, with larger fry outcompeting smaller siblings for food and growing even faster.
- Solution: Separate fry by size into multiple grow-out tanks at 3-4 weeks, giving smaller individuals equal feeding opportunities. Without separation, expect 20-30% of fry to remain runts that may never catch up.
- Tank capacity: A 10-gallon tank can raise 50-100 fry to juvenile stage with daily 30-40% water changes and adequate feeding. Raising only 20-30 fry per tank reduces competition and maintenance for hobbyists.
Common Fry Mortality Causes
- Starvation (Week 1) – 80% of Failures: Cause: Inadequate infusoria availability. Prevention: Practice culturing infusoria for 4-6 weeks before breeding attempts. Maintain multiple backup cultures.
- Water Quality Crashes: Causes: Overfeeding, infrequent water changes, ammonia/nitrite spikes. Prevention: Daily 20-30% water changes from day 10 onward. Test weekly. Keep ammonia/nitrite at 0ppm, nitrate below 20ppm.
- Physical Damage: Causes: Strong filters, rough water changes, temperature fluctuations. Prevention: Sponge filters only, gentle siphoning, maintain stable 78-82°F.
- Premature BBS Introduction: Cause: Introducing baby brine shrimp before day 10 when fry mouths are too small. Prevention: Test readiness by observing if fry bellies show pink/orange coloration after BBS feeding. If clear, continue infusoria only.
Critical Success Window: The pattern is clear: the first 10 days determine overall survival rates, with 80% of failures occurring in this critical window. Successfully navigating these initial two weeks where fry require 4-5 daily micro-feedings means the remaining 6-10 weeks, while still labor-intensive, have dramatically higher success probability.
Practical Approaches, Troubleshooting & Optimization
Realistic Expectations
- First Attempt: 15-25% Fry survival to juvenile stage on initial breeding attempts
- Attempts 3-5: 30-50% After mastering infusoria culture timing and feeding schedules
- Experienced: 60-70% Upper limit with months of practice and refinement
- Time Investment: 30-60 min Daily commitment for feeding, water changes, monitoring over 8-12 weeks
- Total Timeline: 8-12 weeks From spawning to juvenile stage (25-35 hours total per breeding cycle)
- Spawning Success: 70-90% With proper conditioning and setup
Most Common Mistakes
- No Prepared Cultures: Starting breeding without infusoria ready = 90% starvation mortality
- Adults Left with Eggs: Leaving adults beyond 2-4 hours post-spawning = complete egg predation
- Premature BBS: Introducing baby brine shrimp before day 10 = water quality crashes
- Wrong Filter Type: Using standard filters instead of sponge filters = fry get sucked in and die
- Improper Water Changes: Large changes shock fry; no changes allow ammonia buildup
- Impatience: Expecting rapid growth then becoming discouraged by 2-month timeline to 1/4 inch
Troubleshooting Guide
- Spawning Repeatedly Fails: Systematically check: Fish age (4+ months), Water hardness (below 250ppm TDS), Temperature (78-80°F minimum), Sex ratio (1M:2-3F), Stress levels.
- Eggs Don’t Hatch: Verify: Water temperature stable 78-80°F, Eggs actually fertilized, Gentle water flow, Hard alkaline water may prevent development.
- Fry Die in First Week Consistently: Almost certainly inadequate microscopic food availability. Solution: Practice culturing infusoria for 4-6 weeks before next breeding attempt.
- Slow/No Growth After Week 2: Possible causes: Insufficient baby brine shrimp feeding, Water quality issues, Temperature too low, Size competition.
Colony Breeding Alternative
Colony breeding in heavily planted community tanks offers a low-stress alternative for hobbyists wanting occasional fry without intensive daily maintenance.
- Setup: 20+ gallon aquarium with 10-15 ember tetras, extensive Java moss covering 50-60% of substrate, thick floating plant coverage, no egg-eating tankmates.
- Maintenance: Remove aggressive gravel vacuuming near planted areas, feed high-quality varied diet.
- Results: 1-5% natural survival, 5-10 fry per quarter, requires zero special setup.
- Best for: Low-stress approach, maintaining fish in natural schooling environments, accepting low yields.
Mastering the Fry Survival Challenge with Culture Systems
Infusoria Culture Systems
The technical challenge separating successful from failed breeding attempts centers entirely on providing adequate microscopic nutrition from days 5-14 post-hatch.
- Infusoria Culture Method: Container: 1-2 liter glass jar with aged aquarium water; Starter: Small amount of boiled and cooled vegetables (lettuce, spinach, or green beans); Placement: Indirect sunlight or under artificial light at 70-74°F. Culture Progression: Days 1-3 Bacterial bloom, Days 4-6 Clearing phase, Days 7-10 Peak infusoria, Days 14+ Decline. Harvesting: Use turkey baster to harvest from mid-water. Feed 40-50ml per 5-gallon tank 3-4 times daily.
- Green Water Culture: Setup: Fill clear container with aquarium water, add pinch of plant fertilizer or small amount of plant matter. Placement: Indirect sunlight or under 24-hour lighting. Timeline: Clear → cloudy → intensely green over 7-14 days. Feeding: Dilute dense green water before adding. Feed 50-100ml per 5-gallon tank daily.
- Vinegar Eel Culture: Setup: Fill jar halfway with apple cider vinegar, add chopped apple pieces, introduce starter culture. Timeline: 2-3 weeks to establish colony. Harvesting: Place small dish or paper towel soaked in clean water on surface. Eels migrate into clean water. Siphon off and rinse before feeding.
- Baby Brine Shrimp Hatching System: Primary growth driver from weeks 2-8. Equipment Needed: 1-2 liter container with airline-driven strong aeration, Saltwater (1-2 tablespoons aquarium salt per liter), 25-50 watt light for warmth and 24-hour photoperiod, 1/8-1/4 teaspoon brine shrimp eggs. Hatching: Eggs hatch in 18-36 hours at 74-82°F with constant light. Results: Fry fed BBS from week 2 onward grow 2-3x faster than fry on infusoria and powdered foods alone.
Automated vs. Manual Feeding
- Automated drip systems: Provide continuous food from elevated infusoria cultures. Risk overfeeding, require daily culture replacement.
- Manual feeding (recommended): 4-5 scheduled feedings daily with turkey baster or pipette. Better control for small-scale breeding. Distribute throughout tank rather than one location.
Achieving Consistent Success & Understanding Realistic Outcomes
Economic Reality
- Initial Investment: $100-175 (Tank, filter, heater, mesh, plants, cultures, BBS setup)
- Monthly Costs: $15-29 (Electricity, live food replenishment)
- Wholesale Price: $0.50-1.50 (Per juvenile to fish stores)
- Private Sale: $2-4 (Per juvenile in local hobbyist sales)
- Break-Even: 50-100 (Fish sold per month to break even)
- Total Time: 25-40 hrs (Per successful breeding attempt over 2-3 months)
Reality Check: Not a Money-Maker
Breeding ember tetras as a profit venture requires substantial scale before becoming worthwhile. For most hobbyists, breeding serves the rewarding purpose of experiencing the complete lifecycle, supplementing personal stock, trading with local aquarists, and conservation contribution rather than generating meaningful income.
Time Commitment Breakdown
- Setup & Preparation: 3-5 hours (Cycling breeding tank, constructing spawning mops, establishing infusoria cultures, preparing BBS hatching systems)
- Daily Maintenance: 30-60 minutes/day (Feeding 4-5 times initially, daily water changes, monitoring fry development, checking water parameters, maintaining food cultures)
- Duration: 8-10 weeks (Total time per successful breeding attempt: approximately 25-40 hours spread across 2-3 months)
- Learning Curve: 3-6 attempts (Before achieving consistent success. Represents 75-200+ hours invested in developing competency)
When to Pause & Reconsider
Signs You Should Step Back:
- After 3-4 attempts with zero fry survival past week 1: Dedicate 4-6 weeks solely to mastering infusoria culture without fish.
- Spawning never occurs: Source new breeding stock. Some lines are poor spawners or may be same-sex groups.
- Very hard tap water (300+ ppm TDS, pH 8.0+): May require RO water investment that changes economics.
- Life circumstances: Daily obligations conflict with work, vacations, or family commitments.
- Alternative: Consider switching to easier species like white cloud mountain minnows to build foundational skills, then return to ember tetras with experience.
Critical Insights Separating Success from Failure
The #1 Success Factor
The defining characteristic distinguishing breeders who successfully raise 20-50 juveniles per spawn from those experiencing total failure isn’t tank size, equipment quality, or even water parameters—it’s whether microscopic live food cultures were established and thriving before eggs hatched. This single preparation step affects outcomes more than all other factors combined, yet consistently represents the most neglected aspect of breeding attempts.
Key Technical Insights
- Fry Mouth Size: Ember tetra fry mouths measure 50-100 microns in diameter. Commercial “fine” powders typically contain 200+ micron granules that newly free-swimming fry cannot consume.
- Critical Window: The two-week gap between hatching and BBS acceptance creates a survival bottleneck where 80% of breeding attempts fail from starvation.
- Water Chemistry: Soft water improves hatch rates (80% vs 50%) but isn’t absolute. Hobbyists succeed in moderate hardness with proper conditioning.
- Slow Growth Advantage: The slow growth timeline actually provides a buffer against feeding mistakes that would kill faster-growing species.
The Ultimate Success Checklist
- Prepare Micro-Foods First: The #1 rule. Have infusoria cultures ready weeks in advance. 80% of failures are due to starvation in the first two weeks.
- Remove Adults Immediately: Ember tetras have zero parental instinct and will eat their eggs and fry without hesitation.
- Use Sponge Filters Only: Any other filter type is a death trap for microscopic fry.
- Be Patient with Growth: It takes 10-14 weeks to raise fry to a sellable or community-safe size. Don’t get discouraged by the slow progress.
- Daily Water Changes are Mandatory: After the first week, daily 20-30% water changes are essential to manage waste from heavy feeding.
- Selectively Breed from the Best: Track which pairs produce the best results and focus on their offspring for future generations to improve your line.
- Start with Multiple Cultures: Never rely on a single infusoria culture. Maintain at least 3 staggered cultures for redundancy.
- Master BBS Hatching: Set up continuous hatching system before fry reach week 2. This is when growth accelerates.
- Separate by Size: At weeks 3-4, separate fry by size to prevent competition and ensure all get adequate food.
- Keep Detailed Records: Document everything: spawning dates, parameters, pairs used, survival rates, what worked and what didn’t.
- Schedule Stability: Start breeding when you have stable schedules for next 3 months. Missing 2-3 days of feeding in weeks 1-3 causes mass mortality.
- Accept Initial Failures: First attempts are learning experiences. Successfully raising even 10-15 juveniles on first try is genuine achievement.
(Badges: Intermediate Breeder, Micro-Food Culturist, Patience Master, Conservation Contributor)
Conclusion: The Path to Ember Tetra Breeding Mastery
Ember tetra breeding separates into two distinct challenges with different difficulty levels: spawning the adults (intermediate difficulty, 70-90% success rate with proper conditioning and setup) and raising the microscopic fry (advanced difficulty, 15-25% success initially, improving to 50-70% with experience).
Key Takeaways
- Reject “easy to breed” marketing: Embrace reality that nano fish with microscopic fry demand preparation, patience, and persistence across 3-6 attempts.
- Preparation is everything: The 2-3 week lead time for infusoria cultures means successful attempts begin with preparation, not with moving fish to breeding tanks.
- Quality over quantity: Successfully raising 20-40 juveniles per spawn is meaningful breeding. Commercial operations producing 100+ fish represent advanced skill developed over years.
- Match expectations to experience: First attempts teach through mistakes, not immediate success.
Should You Attempt Ember Tetra Breeding?
- Good Fit If You: Want to experience complete lifecycle, Enjoy challenge of rearing tiny fry, Can commit 30-60 min daily for 10-12 weeks, Have stable schedule with minimal travel, Interested in mastering live food cultures, Value learning process over quick results.
- Reconsider If You: Want easy profit or cheap fish, Can’t commit to daily feeding schedules, Expect rapid visible growth, Have frequent travel or irregular schedule, Want simple success without preparation, Lack patience for 2-3 month timeline.
Progressive Approach
- Start with Colony Breeding: Observe natural spawning in planted community tanks with minimal pressure. Learn fish behavior and basic spawning patterns.
- Master Live Food Cultures: Spend 4-6 weeks perfecting infusoria, vinegar eels, and BBS cultures BEFORE attempting serious breeding.
- First Dedicated Breeding Attempt: Set up 5-gallon breeding tank with all proper equipment. Accept 15-25% success as learning experience.
- Refine & Improve: Analyze what worked and what didn’t. Adjust feeding schedules, water parameters, culture timing. Aim for 30-50% survival.
- Achieve Consistency: After 3-6 attempts, patterns become clear. Systematic record-keeping transforms guesswork into refined process.
Conservation Impact
The broader contribution of home breeding extends beyond personal enjoyment to conservation significance. While ember tetras remain common in aquarium trade currently, habitat loss in Brazil threatens wild populations. Establishing robust captive breeding maintains genetic diversity and reduces collection pressure on wild stocks.
Every aquarist successfully breeding ember tetras contributes to sustainable hobby practices and species preservation, however modest the scale. The knowledge and culture systems developed for ember tetras transfer directly to other South American tetras, enabling future breeding of rarer species where captive propagation serves critical conservation roles.
Final Thoughts
Breeding ember tetras ultimately rewards those who embrace the journey rather than fixating solely on outcomes—the satisfaction of watching transparent fry gradually develop orange-red coloration over weeks, the problem-solving challenge of optimizing feeding and water quality, and the achievement of raising even a dozen juveniles to adulthood.
Approach with realistic expectations, thorough preparation especially regarding microscopic first foods, patience for 2-month growth timelines, and persistence through initial attempts, and ember tetra breeding becomes not just achievable but deeply rewarding.
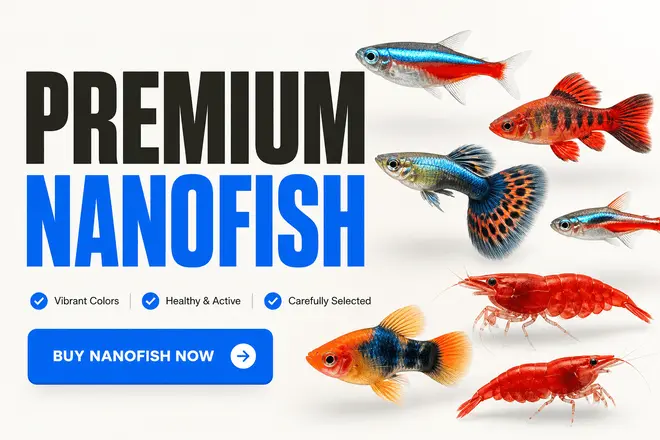
How to Breed Nano Fish Successfully: Tank Setup, Species Tips & Fry Care