So, you’ve fallen down the nano fish rabbit hole, huh? Maybe it started with a mesmerizing Chili Rasbora darting through some floating plants. Or perhaps a YouTube video of Scarlet Badis defending a tiny patch of moss caught your eye. Whatever reeled you in — welcome. You’re in good company.
Breeding nano fish isn’t just a hobby; it’s a window into an aquatic micro-universe where tiny lives unfold in ways that are both fragile and fascinating. And guess what? You don’t need a giant tank, a degree in marine biology, or hundreds of dollars in gear to get started. That’s the magic of nano fish — small fish, small tanks, BIG experience.
But first, what are nano fish?
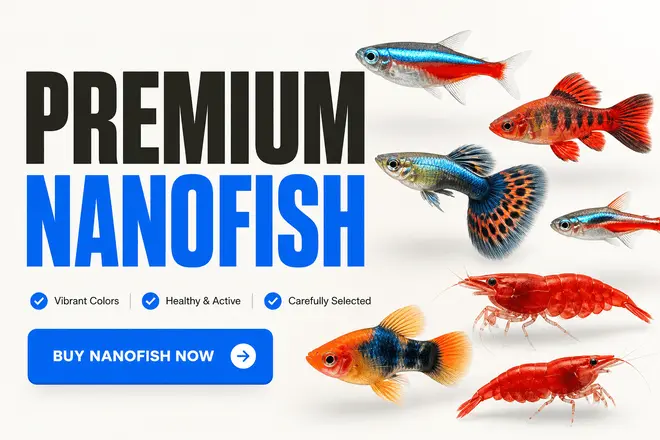
They’re generally freshwater species under 2 inches (5 cm), perfect for tanks as small as 5–10 gallons. Think Celestial Pearl Danios, Chili Rasboras, Ember Tetras, and Scarlet Badis. Tiny fish with big personalities — and even bigger spawning quirks.
Now you might be wondering, Why breed them instead of just buying more?
Well, breeding nano fish is a rewarding way to:
- Observe incredible natural behaviors
- Reduce pressure on wild populations
- Save money over time (fry instead of frequent purchases)
- Create a self-sustaining nano ecosystem
Plus, there’s just something deeply satisfying about watching fry you raised from eggs swim confidently in the tank you crafted for them. It feels personal — like you’ve been invited into their world and trusted with something fragile and magical.
Who is this guide for?
- Home aquarists with small tanks and big dreams
- Beginner breeders eager to explore their first species
- Advanced hobbyists looking to deepen their knowledge or try new techniques
- Anyone tired of sifting through vague advice and wants a real, actionable breeding plan
And if you’re worried you’re “not experienced enough”? Don’t be. This guide breaks everything down step-by-step with the tone of a knowledgeable friend — no gatekeeping, no jargon soup.
Whether you’re here to start breeding Chili Rasboras in blackwater or attempt the delicate dance of Scarlet Badis courtship, this guide has your back. We’ll walk through everything from nano fish breeding tank setup to fry feeding tips — plus plenty of expert-backed insights (and a few hard-earned lessons) along the way.
Let’s make some baby fish.
Benefits of Breeding Nano Fish in a Home Aquarium
Let’s be real: not all of us have space for a 100-gallon aquarium that eats up half the living room. That’s where nano fish — and breeding them — come into their own. Tiny fish don’t just fit in small tanks, they thrive there. And when it comes to breeding? That’s where things get really interesting.
1. Low Space Requirements, Big Rewards
Nano fish are perfect for those of us working with limited space. Live in an apartment? Sharing a house? Only have room for a desktop setup? A 5–10 gallon tank is more than enough to breed many species.
Even better, you can run multiple breeding projects side by side — a little breeding rack of happiness. One tank for Chili Rasboras, one for CPDs, and maybe a third for Scarlet Badis. It’s like running a nano fish nursery.
No need for massive filters, huge lighting rigs, or gallons upon gallons of water changes.
In fact, less is often more when it comes to nano breeding. Stability matters more than size, and smaller tanks make it easier to control water parameters, lighting, and temperature — the holy trinity of breeding triggers.
2. Discover Their Unique Breeding Behaviors
Breeding nano fish is like unlocking secret mini-games inside your tank. Some are egg scatterers (they toss their eggs into plants and hope for the best), others are cave-spawners (like Scarlet Badis, who’ll zealously guard a clutch in a leaf litter cave).
Each species has its own charming routine, from flirtatious fin flicks to synchronized darting dances.
Watching a male Chili Rasbora subtly color up and lead a female into a mossy nook to lay eggs? Priceless. Not to mention, these tiny behaviors are easy to miss in a community tank — but in a breeding setup, you’re front and center for the action.
You’ll start noticing things others miss — water chemistry cues, spawning readiness, even who’s pairing off and who’s just not feeling it today (yes, fish have off days too).
3. Perfectly Suited to Planted Tanks
If you’re into aquascaping — or even just love a lush tank full of Java moss, Subwassertang, and floating Frogbit — nano fish are your dream come true. Many species naturally breed in planted tanks.
Why? Because these plants mimic their native environments — slow-moving, densely vegetated streams and pools.
Java moss is a godsend for breeders. It hides eggs from hungry adults and serves as a buffet of infusoria for newly hatched fry. Floating plants like Salvinia and duckweed diffuse light and offer micro-habitats where fry can thrive unnoticed.
Planted tanks aren’t just pretty — they’re functional breeding habitats. They:
- Reduce stress and aggression
- Provide hiding places for fry
- Boost water quality naturally
- Support live micro-food ecosystems
4. Ideal for Ethical, Sustainable Hobbyists
Many nano fish — especially Chili Rasboras and Celestial Pearl Danios — come from fragile ecosystems threatened by habitat loss. By breeding them at home, you’re helping reduce demand for wild-caught specimens.
Captive-bred fish tend to be hardier, better adapted to tank life, and less prone to disease. Plus, if you breed them successfully, you can share with local hobbyists or even your local fish store, spreading the joy while supporting conservation.
5. It’s Just…Really Satisfying
Raising fish from egg to adulthood is nothing short of magical. It’s like watching a slow-motion miracle. You’ll find yourself obsessively checking for fry, tweaking the light timer to trigger spawning, or spotting your first successful batch of free-swimming babies and doing a literal happy dance.
And unlike breeding big fish, with nano fish you can breed in batches, experiment with setups, and tinker without taking over your whole house (though be warned — nano breeding is a slippery slope, and you may soon “accidentally” own five tanks).
TL;DR: Breeding nano fish is rewarding, educational, conservation-friendly, and possible in small spaces. Whether you’re looking for a peaceful project, a personal challenge, or just want to see something truly special — you’re in the right hobby.
Ready to start setting up your breeding tank? Let’s get into the gear, gadgets, and green stuff next.
Nano Fish Breeding Essentials: Equipment & Setup
Creating the ideal breeding environment for nano fish doesn’t have to be expensive or complicated — but it does have to be intentional. These fish may be tiny, but they’re sensitive to their surroundings. Get the basics right, and your fish will feel safe enough to do their thing. Miss a detail, and you’ll be waiting… and waiting… and wondering what went wrong.
So, let’s break it down into the three most important parts of a successful nano fish breeding tank setup: tank size, equipment, and aquascaping.
Best Tank Size for Breeding Nano Fish
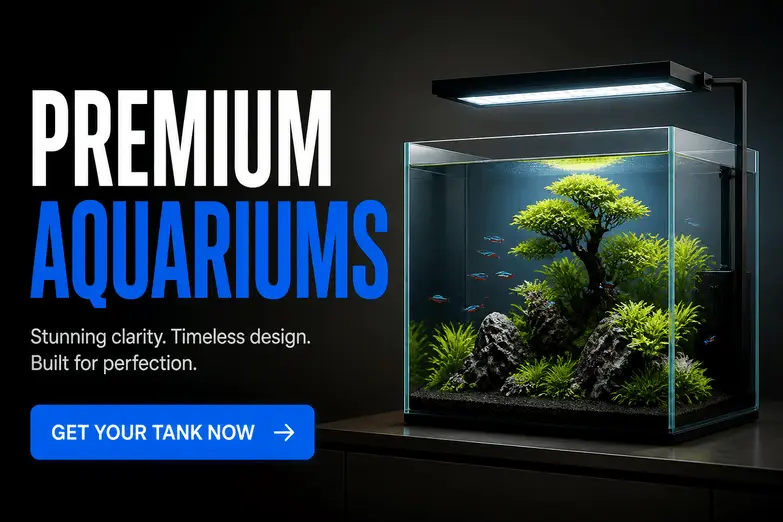
When we talk nano fish, we’re in the realm of small tanks — but not too small. A 5 to 10-gallon tank is the sweet spot for most species. If you’re going metric, that’s around 20 to 40 liters. It’s just enough space for stable water parameters while still being compact and cost-efficient.
But there’s a decision to make: Should you go with a 5-gallon cube or a 20L long tank?
Here’s how to decide:
- 5-gallon cube: Great for solo species, single pair breeding (like Scarlet Badis), or experimental setups.
- 10-gallon or 20L long: Ideal for schooling breeders (like Chili Rasboras or CPDs), continuous spawning setups, or growing out fry.
A longer tank gives you more horizontal swim space — super helpful for shy fish or those who spawn in groups. Plus, more water volume means more stability in temperature and chemistry, which makes your life easier and your fish happier.
Pro tip: Always have a tight-fitting lid. Most nano fish are fantastic jumpers, especially when spooked or during spawning excitement. You don’t want to lose your best male to a midnight leap.
Filters, Heaters, and Lighting
Your fish may be small, but their requirements for water quality are anything but.
Sponge Filter for Fry
If you remember just one thing from this section, make it this: use a sponge filter.
Sponge filters are:
- Gentle (won’t suck in or toss around fragile fry)
- Effective (great biological filtration)
- Fry-safe (no strong currents or risky intake tubes)
And bonus — fry often graze on the biofilm that grows on the sponge. It’s like a buffet for baby fish.
Pair your sponge filter with an air pump and control valve, and you’re good to go. Keep the bubbles soft and slow — turbulence stresses out both breeders and their eggs.
Heaters: Keep It Stable
Most nano fish are tropical and prefer temps between 72–78°F (22–26°C).
Use a reliable adjustable heater, not one of those tiny preset ones. Stability is more important than pinpoint accuracy. A 1-2°F swing might not seem like much to you, but for fish trying to spawn? It’s a big deal.
Lighting: Soft and Subtle
Keep it dim. Many nano fish (especially blackwater species like Chili Rasboras) prefer shaded conditions. Bright lights can actually suppress breeding behavior or cause stress.
Use:
- LED lights with a dimmer
- Floating plants to diffuse light naturally
- A timer for consistent day/night cycles (8–10 hours is a good start)
If you want to simulate rainy season spawning triggers, gradually shorten or extend the photoperiod — subtle seasonal cues like this can activate the fish’s BPG axis and spark spawning behavior (yep, that hormone cascade we talked about earlier).
Plants and Substrate for Breeding Tanks
This is where things get green — and where your choices have a direct impact on both spawning success and fry survival.
Java Moss: The Unsung Hero
It’s not just decoration. Java moss is the #1 breeding plant for nano fish.
Why? Because:
- It hides eggs and fry from hungry adults
- It fosters microfauna that fry can eat
- It thrives in almost any light or water condition
Other excellent plant choices include:
- Subwassertang (a lovely alternative to moss)
- Floating plants like Frogbit or Salvinia for cover and shade
- Anubias or Crypts for structure and biofilm surfaces
Dense vegetation makes fish feel secure. It also creates visual barriers that reduce aggression and gives females places to hide if males get feisty.
Substrate: Bare Bottom vs Fine Sand
There are two camps here — and both are valid.
Bare bottom tanks:
- Easier to clean
- Better visibility for spotting eggs and fry
- Great for continuous breeders
Fine-grain sand or dark substrate:
- More natural-looking
- Helps some species trigger natural behavior
- Supports root-feeding plants
What’s the best substrate for breeding nano fish? Depends on your goals. If you’re trying to observe and collect eggs, go bare bottom. If you’re setting up a planted, semi-natural spawning tank — opt for fine black sand or smooth gravel.
Whichever route you choose, keep it clean. Uneaten food and detritus can spoil water fast and jeopardize delicate fry.
How to Condition Nano Fish for Breeding
Here’s the truth: throwing two nano fish into a tank and hoping for babies rarely works. These aren’t guppies. Nano fish need to be conditioned — physically and hormonally — before they’ll even think about breeding. You have to recreate the little nudges that nature gives them in the wild.
Don’t worry — you don’t need a rainforest or a monsoon. You just need to understand a few key strategies, and the fish will take care of the rest.
Why Conditioning Matters
Conditioning is basically the fish version of “getting in shape before the big event.”
Before spawning, both males and females need:
- Extra nutrients to develop healthy eggs and sperm
- Environmental cues to trigger the breeding hormones (remember the BPG axis?)
- A sense of safety and readiness
Neglect this phase, and you might end up with no eggs, poor hatch rates, or weak fry that don’t survive long.
Feeding Live Food: The Secret Weapon
Nothing beats live food when it comes to conditioning. It mimics their wild diet, triggers hunting behavior, and is packed with proteins and fats needed for gamete development.
Here are the MVPs:
1. Microworms
These are tiny, wiggly worms that live on oatmeal and are perfect for nano fish. They’re gentle on the stomach and stimulate strong feeding responses.
Bonus: Fry love them too. They’re a great first food for newly hatched babies.
🧪 Want to culture your own? (I’ll drop a link to a Microworm Culture for Fry guide here for you.)
2. Baby Brine Shrimp (BBS)
BBS are a classic. They’re nutritionally dense, easy to hatch, and highly visible to fish. Feed them freshly hatched — they’re at peak nutrition during the first 24 hours.
- Great for conditioning and fry growth
- Easy to culture daily with a simple soda bottle setup
- Boosts color, activity, and reproductive health
3. Daphnia
These tiny crustaceans are like nature’s laxative (yep, really). They clean out the digestive system and improve gut health. They’re also amazing for fish that are close to breeding condition but need a final “push.”
Pro tip: Feed smaller amounts, more often — 2–3 times a day if possible during conditioning. Just make sure you’re not overfeeding and messing with your water quality.
Water Changes & Environmental Triggers
Besides diet, water parameters are a powerful cue. In nature, the rainy season kicks off the breeding cycle. You can replicate this by doing the following:
- Perform a 20–30% water change with slightly cooler water (1–2°F drop)
- Increase water softness and lower pH slightly (especially for species like Chili Rasbora)
- Add leaf litter (like Indian almond leaves) to mimic tannin-rich blackwater
- Adjust lighting to simulate longer or shorter days — based on the species’ natural habitat
These tweaks “flip the switch” in the fish’s brain, signaling it’s time to spawn. It’s like triggering a built-in calendar they’ve carried through evolution.
Pairing Up Your Breeders
For some nano fish (like Scarlet Badis), you’ll need to condition a pair separately, then introduce them to the breeding tank when they’re both ready. For others (like Chili Rasboras), you condition the entire group together and let them sort out the details.
Watch for signs of readiness:
- Males becoming more colorful and active
- Females swelling with eggs
- Increased chasing or fin flaring (normal courtship behavior)
But don’t confuse aggression with readiness. If a male is relentlessly harassing females, remove him and let everyone cool off before trying again.
Bottom Line: Conditioning is not optional. It’s the most overlooked — and most important — step in nano fish breeding. Feed well, tweak your environment, and give your fish time. You’re not just feeding them — you’re flipping the breeding switch.
Coming up next…
Choosing the Right Nano Fish Species to Breed
We’ll go deep into Scarlet Badis, Chili Rasbora, and Celestial Pearl Danio — covering how they breed, what makes each one special, and who should try which first.
Choosing the Right Nano Fish Species to Breed
Alright, let’s talk fish. Nano fish come in many shapes, colors, and personalities — and not all are equally easy (or rewarding) to breed. If you’re just getting started, picking the right species can mean the difference between a tank full of thriving fry… and months of head-scratching silence.
Below are three of the most popular and beginner-to-intermediate-friendly species. Each has its quirks, charm, and ideal setup — and we’ve got full deep-dives waiting for you when you’re ready to specialize.
Scarlet Badis (Dario dario)
Imagine a ruby-colored dragon in miniature. That’s Scarlet Badis — one of the most striking nano fish out there. But don’t let the size fool you. These guys are feisty. Males are territorial and often require a dedicated breeding tank, especially during courtship.
Breeding behavior: Cave spawner
Setup: Lots of plant cover + leaf litter + small caves
Challenge level: Medium to high
Tip: Condition with live foods only. These micropredators often refuse flakes or pellets.
👉 [Read the full Scarlet Badis breeding guide]
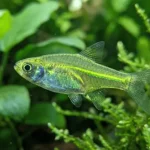
Chili Rasbora (Boraras brigittae)
Tiny, glowing red, and peaceful — Chili Rasboras are a top pick for community tanks and first-time breeders alike. These fish are continuous spawners, meaning they don’t need a big dramatic courtship ritual — just the right water and enough plant cover, and they’ll do their thing.
Breeding behavior: Egg scatterer in moss and plants
Setup: Blackwater, dense vegetation, no predators
Challenge level: Beginner-friendly
Tip: A species-only tank with lots of moss allows fry to survive naturally.
👉 [Read the full Chili Rasbora breeding guide]
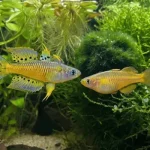
Celestial Pearl Danio (Danio margaritatus / CPD)
Think galaxy-in-a-fish. CPDs are beautiful and surprisingly willing to breed in the right setup. Males will chase and display, while females scatter eggs across fine-leaved plants like Java moss.
Breeding behavior: Egg scatterer
Setup: Breeding mop or moss for eggs + remove adults post-spawn
Challenge level: Moderate
Tip: Collect eggs daily and hatch separately to avoid predation.
👉 [Read the full CPD breeding guide]
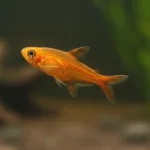
Other Great Options to Explore:
- Ember Tetra – Peaceful, easy to condition, great in planted tanks
- Pygmy Corydoras – Adorable bottom-dwellers that lay eggs on glass and plants
- Green Neon Tetra – Similar to Chilis but love soft, acidic water
- Clown Killifish – Colorful top-spawners with interesting breeding behavior
Each species has a unique rhythm. The key is choosing one that matches your space, setup, and patience level. Not sure where to start? Chili Rasboras are a perfect gateway fish — colorful, peaceful, and forgiving.
Managing Eggs and Raising Fry
Breeding nano fish is only half the battle. The real challenge? Keeping the eggs safe, getting them to hatch, and raising fry so small they’re basically animated commas. But don’t worry — if you know what to expect, you can absolutely do this.
Let’s break it down from egg spotting to fry feeding like a pro.
Spotting the Eggs: Tiny, But Not Invisible
Most nano fish eggs are around 0.5 to 1 mm — think poppy seed size. Depending on your species, they might:
- Stick to plant leaves (Chili Rasbora, CPD)
- Be laid inside a cave (Scarlet Badis)
- Drop randomly into moss or substrate
Tip: Use a flashlight at an angle — eggs will catch the light and appear as tiny pearls or jelly dots.
If you’re breeding group spawners (like CPDs), check early in the day. They usually spawn at first light.
To Collect or Not to Collect (The Great Fry Debate)
This depends on your fish, setup, and breeding goals.
Option 1: Leave Eggs in the Tank
Perfect for species-only tanks with dense planting. Some eggs and fry will survive naturally. This “set and forget” method works well for Chili Rasboras and Ember Tetras.
- Pros: Low effort, less stress
- Cons: Lower fry survival, harder to track progress
Option 2: Remove the Adults
Once spawning finishes, remove the parents to prevent them from eating the eggs or fry. This is common for Celestial Pearl Danios or any species prone to predation.
- Pros: Protects the next generation
- Cons: Timing is everything — too soon and you interrupt spawning
Option 3: Collect Eggs Manually
Use a pipette or turkey baster to gently suck up eggs and move them to a hatching container.
- Pros: Maximum control and survival
- Cons: Requires close monitoring and steady hands
Preventing Predation and Mold
Once eggs are laid, two main threats loom:
- Hungry adults (if they’re still in the tank)
- Fungus and mold (especially if eggs are infertile or the tank isn’t clean)
Here’s how to guard against both:
- Use Indian almond leaves or catappa — their natural antifungal properties help protect the eggs
- Maintain gentle water flow with a sponge filter — prevents dead spots where mold blooms
- Consider adding a drop of methylene blue (ONLY in egg-only containers — never in planted tanks)
- Keep lighting dim — bright light can stress eggs and fry
The Hatching Window
Eggs typically hatch in 24–72 hours, depending on the species and water temperature. Warmer water speeds things up (to a point).
Once hatched, the fry will:
- Remain motionless for a day or two, absorbing their yolk sacs
- Start free-swimming when the yolk is gone — this is when feeding becomes critical
Feeding Schedule for Fry
The fry stage is where many beginners struggle — not because they don’t care, but because they underestimate just how small and fragile fry are.
Your feeding schedule needs to be:
- Frequent: 3–5 times a day (small amounts)
- Appropriate in size: Fry can’t eat regular food at first
- Consistent: Missing meals can kill a batch of fry
Phase 1: Days 1–7 – Infusoria
If you’re not familiar, infusoria are microscopic critters — think protozoa and bacteria-level tiny. They grow naturally in moss, leaf litter, and “seasoned” tanks.
Options:
- Pre-seed your tank with Java moss and let nature handle it
- Create your own culture (banana peel in water, left in sunlight)
- Add commercial infusoria cultures or starter kits
Phase 2: Days 7–14 – Microworms or Vinegar Eels
Once fry are free-swimming and a bit larger, switch to:
- Microworms – Easy to culture, wiggle enticingly
- Vinegar eels – Stay suspended in water longer, giving fry time to find them
Feed multiple times a day — just a few worms at a time. Too much uneaten food = poor water quality = dead fry.
Phase 3: Weeks 2+ – Baby Brine Shrimp (BBS)
At around 2 weeks, most nano fry can handle freshly hatched BBS. It’s a game-changer for growth and survival rates.
Pro tip: Rinse brine shrimp well to avoid introducing salt to your tank.
Water Quality: Your Silent Killer or Secret Weapon
Tiny fry = tiny tolerance for mistakes. Test daily if possible.
Keep:
- Ammonia & Nitrite: 0 ppm
- Nitrate: Under 20 ppm
- Temp: Stable
- pH: Species-specific (often 6.5–7.2)
Small daily water changes (5–10%) are safer than big ones. Use aged water to avoid parameter swings.
Tracking Progress
Keep a journal or spreadsheet:
- Date of spawn
- Hatch time
- Survival count
- What they’re eating
- Growth milestones
This helps you dial in your system — and makes your future breeding attempts 10x easier.
TL;DR:
Raising nano fish fry takes attention to detail, microscopic food, and a steady hand. But once you’ve done it? There’s nothing like seeing those tiny fish grow up, knowing you made it happen.
Troubleshooting Common Breeding Problems
This section is like your fishroom first aid kit — packed with quick diagnoses, clear explanations, and practical fixes. Let’s tackle the most common issues you’ll face while breeding nano fish.
1. Mold Growing on Eggs
Symptom: White fuzz overtakes the eggs within 24–48 hours.
Cause: Fungal growth due to unfertilized eggs, poor water flow, or dirty tank.
Fixes:
- Remove dead/fuzzy eggs manually with a pipette or tweezers.
- Improve water flow using an air stone or sponge filter.
- Add catappa leaves or methylene blue (in egg-only containers).
- Avoid overfeeding the breeders — excess organics fuel fungus growth.
Tip: A few infertile eggs are normal, especially with new or unconditioned fish. Don’t panic — just clean up and try again.
2. Low Hatch Rate (or No Hatch at All)
Symptom: Eggs disappear or never develop into fry.
Causes:
- Poor male fertility
- Eggs weren’t fertilized
- Water temp too low or high
- Wrong pH or GH for that species
Fixes:
- Improve conditioning (live foods, cleaner water, more time).
- Double-check your water parameters. Some species need soft, acidic water (like Chili Rasboras); others prefer neutral.
- Try pairing different males and females. Sometimes it’s just a bad match.
- Confirm the species’ ideal temperature range — often spawning stalls under 72°F (22°C) or over 80°F (27°C).
3. Adults Eating Eggs or Fry
Symptom: Eggs vanish overnight. Fry appear and are gone the next morning.
Common Culprits: Most nano fish will snack on their own eggs/fry if given the chance.
Fixes:
- Remove the adults post-spawn.
- Add denser planting (Java moss, Subwassertang) to give fry hiding spots.
- Go for species-only breeding tanks — even peaceful fish will eat fry if food is scarce.
Pro tip: Scarlet Badis males may guard their eggs, but most other nano species will eat whatever they find, no matter how cute it is.
4. Fry Dying After Hatching
Symptom: Fry hatch, but few survive beyond a few days.
Cause: Nutritional deficiency, bad water quality, wrong food size, or overfeeding.
Fixes:
- Start with infusoria immediately after yolk absorption.
- Avoid using powdered food too soon — many fry can’t eat it yet.
- Feed tiny portions, but often.
- Keep up daily water changes (5–10%) with aged, dechlorinated water.
- Test for ammonia — even trace amounts are deadly to fry.
5. Breeding Pairs Show No Interest
Symptom: Nothing happens for weeks. Fish are active, but there’s no courtship or spawning.
Possible reasons:
- Fish too young or not fully conditioned
- Wrong sex ratio
- Poor diet
- No environmental cues
- Tank mates causing stress
Fixes:
- Separate males and females for a few days, then reintroduce to spark interest.
- Try a 20–30% water change with slightly cooler water.
- Adjust lighting and photoperiod to mimic seasonal changes.
- Ensure diet is 80–90% live food for 2 weeks.
- Double-check that your “female” isn’t just a dull male (looking at you, CPDs).
6. Infusoria Not Working or Culture Crashed
Symptom: Fry not eating, no visible food in the tank.
Fixes:
- Keep multiple infusoria cultures going so you’re not left hanging.
- Add a small amount of tank water to your infusoria container to “seed” it.
- Place the culture near a sunny window — warmth + light = growth.
- Supplement with vinegar eels or microworms when fry are large enough.
7. Overrun by Snails or Planaria
Symptom: Fry disappear or struggle to eat; glass swarmed with worms/snails.
Causes:
- Overfeeding
- Lack of cleanup crew
- No water changes
Fixes:
- Use less food per feeding and siphon uneaten bits.
- Introduce a few Ramshorn or bladder snails as gentle cleanup crew.
- Avoid harsh meds — they can harm fry too.
- Quarantine any plants before adding to breeding tanks.
The “Is This Normal?” Syndrome
You’ll ask yourself this a lot. Here’s the rule of thumb:
- If water tests are clean
- Fry are eating and swimming
- Plants are thriving
You’re probably doing better than you think.
Breeding is part art, part science, and part patience. You’ll make mistakes — everyone does. The key is paying attention, keeping notes, and tweaking one thing at a time.
What’s the easiest nano fish to breed?
Chili Rasbora
How long do nano fish eggs take to hatch?
24–72 hours, depending on species
Do nano fish eat their eggs or fry?
Yes, often
What is the best food for nano fish fry?
Infusoria, microworms, baby brine shrimp
Can I breed nano fish in a community tank?
Not recommended for fry survival